Well, here's a great tutorial, already typed out for you by Kathy Smith.
I'll copy and paste it for you. But it came directly from her site Here. I'll go ahead and add a few screen shots for those of you who need visuals! Please email me if you have any other questions.
ETA: My opinion. When downloading and installing fonts. Extract your files to live in the Font directory in your C: Drive--> Windows-->Font Folder. You don't need to move them anywhere. The Font Thing looks for fonts in this file first.
Click on the pictures for full view
Making "Collections" In The Font Thing:
1. Click on the "Collections" tab
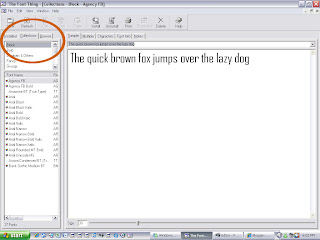
2. right click in the top white box
3. Choose "New" from the pop-up menu
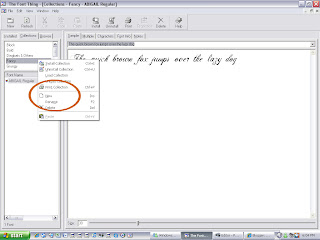
4. Type the name of a grouping you want to create. I've made the following collections, but you can choose your own (you may even want to have an "unknown" for fonts you can't place right away, but can come back to):
Calligraphy, Ding Frames and Buttons, Dings, Famous, Fancy, Foreign, Fun, Graffiti and Grunge, Holiday and Spooky, Kid Print, Learning (like for teaching kids to write), Music, Object Letters, Print, Script, Western.
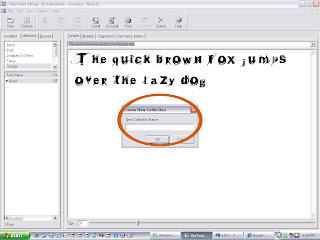
5. Continue doing the same until you have all your categories listed.
Uninstalling Fonts and Making "Collections":
1. Click the "Browse" tab
2. Find your new font folder that you moved everything (except standard windows fonts) into
3. If you originally had installed these fonts in your windows/fonts folder and had to move them, they have been "installed" on your system. You now can decide if you actually want them installed (they'll always come up in your programs, sometimes jamming the program) or if you'd like to just use them when you need them. If you'd like to keep them "installed", just skip over #4.
4. Select all of the fonts in the new folder and right click. Choose "Uninstall" from the popup menu.
*NEVER "UNINSTALL" FONTS INSTALLED IN YOUR WINDOWS/FONTS FOLDER! IT WILL DELETE THEM IF THEY ARE IN THAT FOLDER*.
Adding Fonts to "Collections":
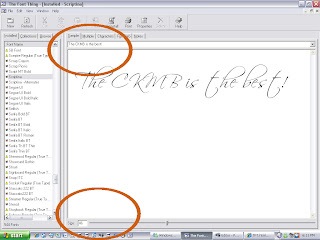
1. Select the "Sample" tab for viewing your fonts
2. select the first font in your list
3. Can't really see it, can you? Increase the size of the font at the bottom to a much higher number (around 48 is good).
4. Right click the first font, "Add to collection" and choose which collection you want to add it to.
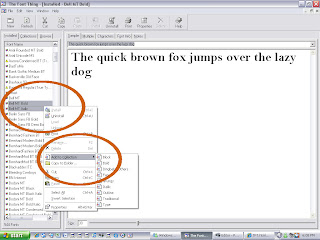
5. Go down the list and add each one to a collection (don't skip over any or you'll forget to add them to one later and will forget about that font completely...this is where that "unknown" collection I mentioned earlier comes in handy.
6. Now your fonts should all be organized! You can click on the "Collections" tab and click the collections to see how you did.
Downloading New Fonts:
This is just a note that might make the process a little easier...make a sub-folder in your new font folder for "New" fonts that you still need to add to collections (to make it even easier for yourself, you can make sub-folders for each category under the "new" fonts folder you just added and download the fonts into the appropriate category). Only unzip fonts into those folders after downloading so that you don't forget to add them to a collection. At this point, it would be easiest for categorizing them later if you write down the new font names and what category they are in. Move them into your new "fonts" folder. Then you can go into "browse" and find the fonts, adding them to collections.
How to Use Fonts:
1. Now when you're looking for "just the right font" you can browse your collections and sample the type that you'd like to see how it will look.
2. When you find "the right font" that you want to use, right click on it and choose "load" from the popup menu. This will allow you to use it immediately, but will automatically unload it when you shut down your computer...keeping your installed fonts to the minimum.
3. If there is a font that you use ALL the time (ummm...Scriptina comes to mind...) that you always want available without having to load it, just right click it and choose "Install". This will keep it installed on your system, ready to use at all times until you choose to "uninstall" it.
4. Remember:
Uninstalling a font from Windows/Fonts folder will permanently delete it from your system...
Uninstalling a font from any other folder will only remove it from the "installed" list, but is still accessible!
Text Samples:
You can always type in whatever text you'd like to sample, but some text we use more than others (like our names) and want as a permanent text sample to just choose. Another text sample I'd suggest is the standard "The Quick Brown Fox Jumps Over the Lazy Dog" done in all caps, and done in all small letters since some fonts are only one or the other. I usually use it as a combination...the same sample with half done in small letters and half in caps.
1. Choose "View" in the top menu
2. "Options"
3. "Text Samples"
4. "Add" and Type!

I just like the valuable info you supply for your
ReplyDeletearticles. I will bookmark your weblog and test once more here frequently.
I am slightly certain I'll learn lots of new stuff right right here! Good luck for the next!
my web blog; natural cellulite treatment